Tonight, we will finally finish the Churchill AVRE with a small addition in the form of a fitting base. This will be a pretty short article, a bit more relaxed after the previous article about the painting, but now, let’s get into it:
Materials
But first of all, we need to know what we need:
The Churchill – construction and painting
wooden base – diy or in this case recycled from an old trophy
Styrofoam / xps – rests from house-insulation
Texture paints – here I used AK smart mud
Various pices of scenery material – these include some old bushes as well as grass fibers
PE-leaves – here I used the ones from “Matho Models” – “oak foliage” scalemates and “plants & weeds A” scalemates
Other than that, we need a screw and some paints, that’s it.

Construction – Heavy Metal
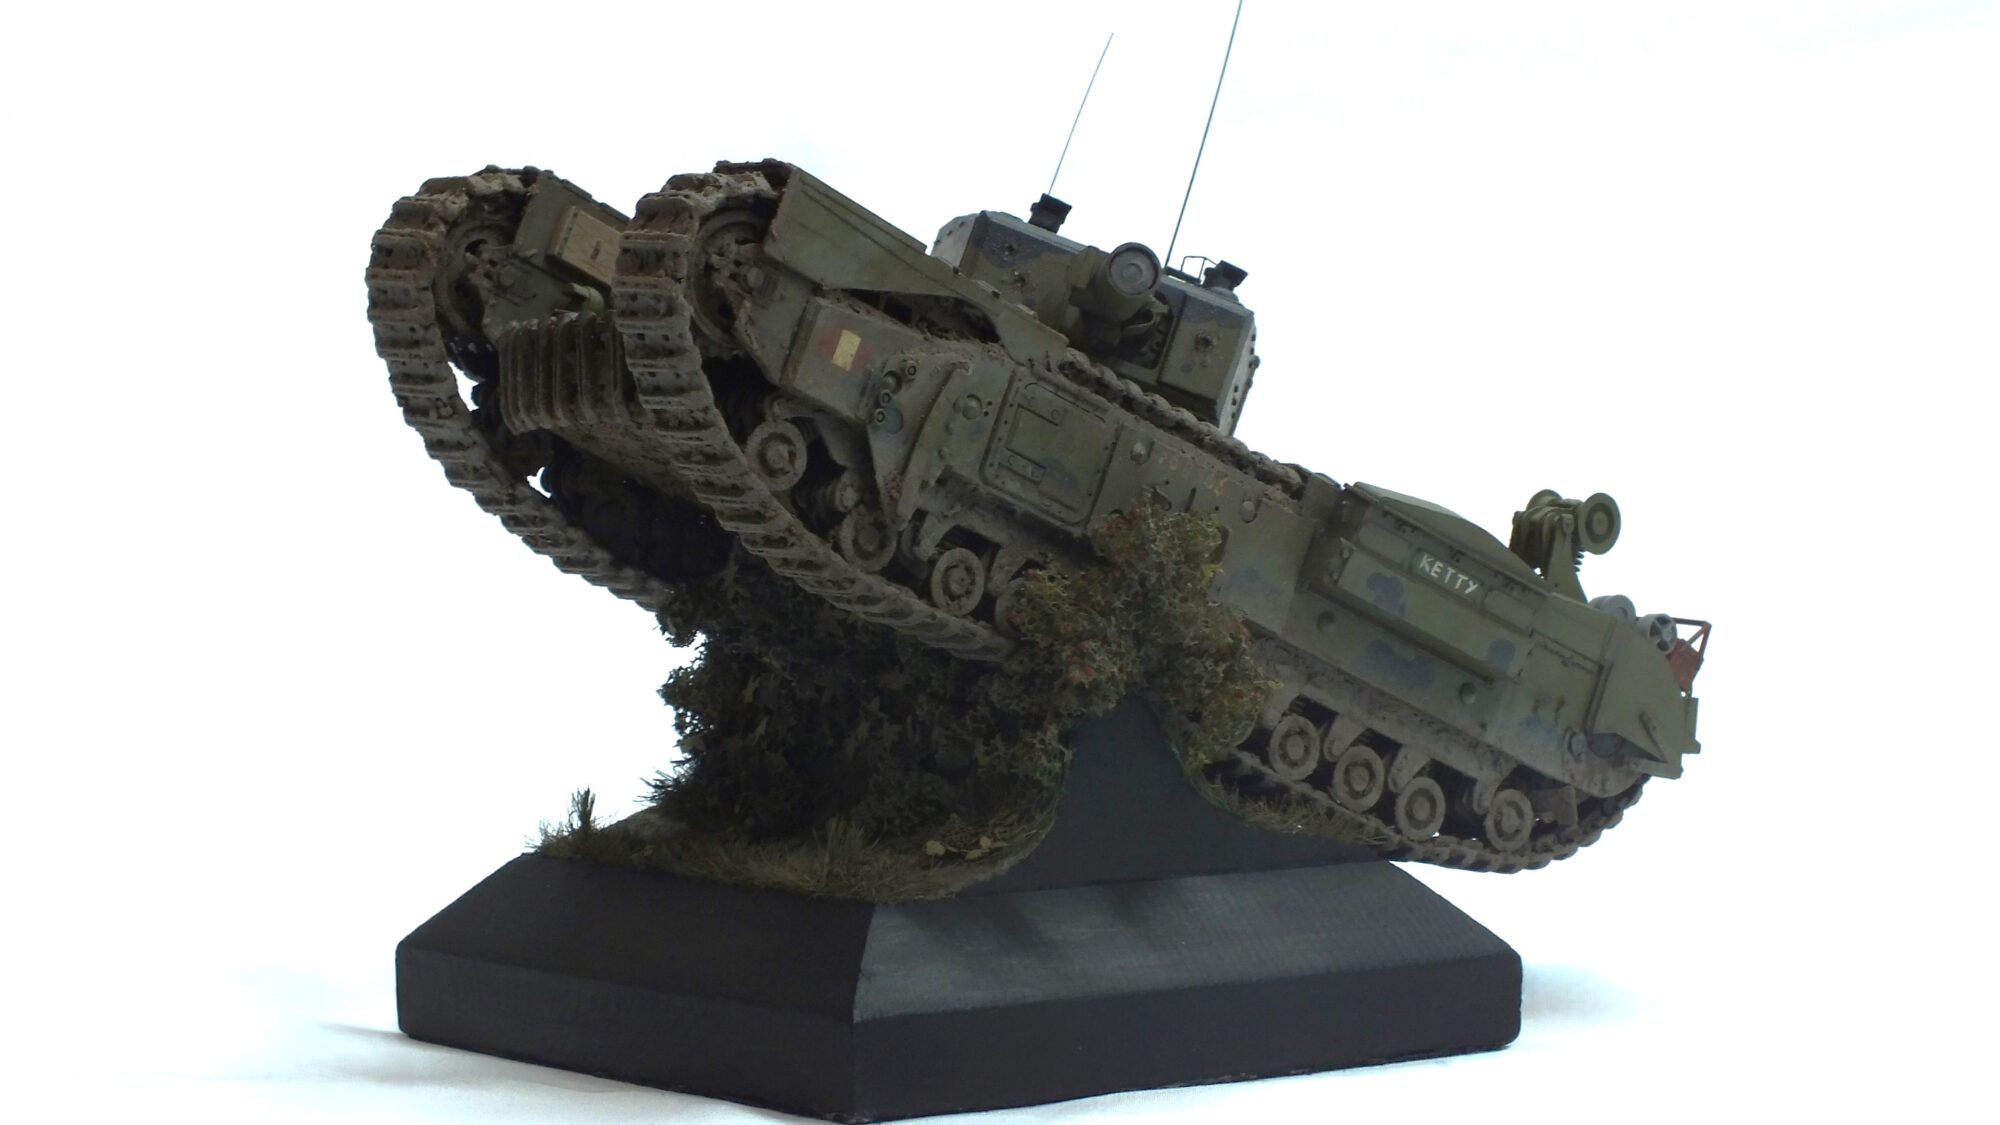
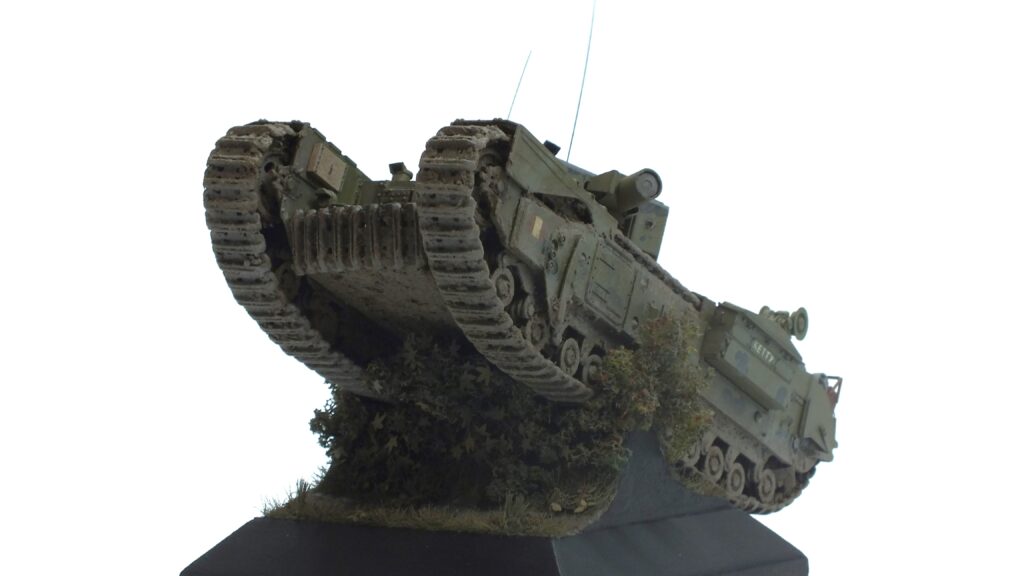
Let’s get this party started, which it actually did even during the final stages of construction of the model. First thing we have to get done: The base. And that’s exactly where we encounter our first problem – how do you angle a model to such a drastic degree? -> glue in any kind won’t be of help. additionally I wanted to keep this fella removable for pictures and further painting.
The angle we are talking about:
So I had to find another solution. In the end I was inspired by my holder for painting, the “octopus” by “Sukērumoderā”. I used a big metal screw, I believe about M6 or M8 and glued it vertically into the base wooden stand. The stand was already premade and recycled from an old trophy I was gifted to do exactly that.
After that I eyeballed the height of the tank and cut a slip into the screw. After that I bend it using a vice, some pliers and a hammer. That turned out to be perfectly fine and rigid. I then secured the model with two bolts. One underneath the tank and another inside pinching the lower hull between.
After that I added the XPS foam (or Styrofoam, I don’t know what it’s called) by gluing it into place using PVA-glue and carved the basic shape using a box cutter. The finer details I then added using an x-acto-blade. For Texture I used “Ak’s “”smart mud” with some real dirt and stones added into the mix. Lastly, I formed it using toothpicks, small wooden sticks and left over tracks from this and other models. And we are already done here.
Base-painting – a solid base, hidden but needed
Now with the base finished we can continue. Painting was very simple in this case. Just the same as the tank, so I would recommend for you to go ahead and read that article to find out all the details. but in short, we have base-painting using Revell’s “Erdfarbe” followed by various washes and finished with detail painting small stones other highlights. Not much more to tell here. It really was that simple. I mean, almost everything will be hidden anyways in the end.
Foliage – A lot of PE?
Now we can start with the fun part for this diorama. The vegetation. First off I began as always with a base layer of grass-fibres of varying lengths. I added these manually by holding small tufts in the tweezers and placing them with some PVA-glue directly onto the painted base. Here I used a total of three different lengths as well as multiple different colours. I will paint them all, so you might ask yourself why? But you can actually see a small variation in tone between them still, since I do not prime my bases. However I have to admit the difference is very subtle.
For the bushes themself I can’t tell you exactly what I used, since I just have a drawer with all kinds of scenery material, manly recycled from old dioramas or model railway layouts I got for cheap, then dismantled and recycled everything I could. However, any common scenery material should work just fine.
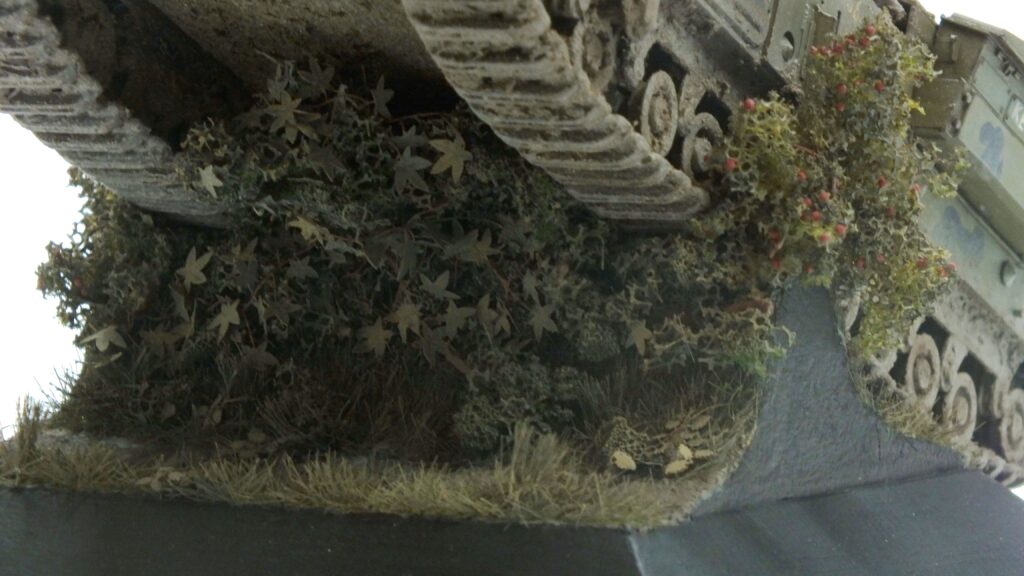
Now we can begin to add the final details before we head into painting. First of I used some copper wire and plastic to add a few branches throughout the vegetation. These are some really nice details especially after painting, which will break the otherwise very monochromic feel of the large green areas. But something was still missing, everything still kind of felt blank at this moment. Usually this is not a big problem, but here I want the vegetation to really pop and feel full and almost overgrown. Since that’s just pretty much what I have in mind when I think of the hedgerows in Normandy.
Thus, I decided to yet again experiment. I cracked open two packages of PE leaves and placed these basically all around. Small ones in the grass as small shrubs and similar. Larger ones intertwined in the hedgerow itself. And it was so worth it. PE-leaves or also paper leaves are really expensive, but so worth it, especially in a case like this. I am so happy with the end result now, so I think we can start with the second round of painting
Painting – Make green greener?
In the beginning this step always feels so stupid. Almost everything is already green. foliage? -> green. Grass-fibres? -> green Only the PE-parts stood out. (these were primed using the metal primer from “Tamiya”) However you just must push through the beginning, as it pays out so much.
First, I like to begin with a basecoat of a desaturated green. A colour very similar in shade to the basecoat of the model. I usually dry-brush first and then use a fairly heavily diluted colour afterwards. Works out nicely every time. I applied this to all areas with vegetation as well as all the PE parts. After that I always go over all the parts again, now with a more saturated and lighter dry brushing effect. This gives a lot of nice variation and contrast. I also used this colour to go again over all of the individual leaves in the model. And with that I was done with the base painting at least.
Finishing touches
Now for details. First off, I painted all of the branches and similar I added previously in a dark and rich brown colour. Just that, that was perfectly fine, I did not need to add anything more, as most of them were just so thin. Of course as some of the bushes had berries, I also needed to paint them in a warm red to give a small touch of colour. And that’s it, we are almost done.
Just the finishing touches are now on the agenda and that’s actually not a lot in this case. First and foremost, I placed and secured the model in its place and form the vegetation naturally around it. I can actually remove the model still and the vegetation keeps its shape which is just so nice to have.
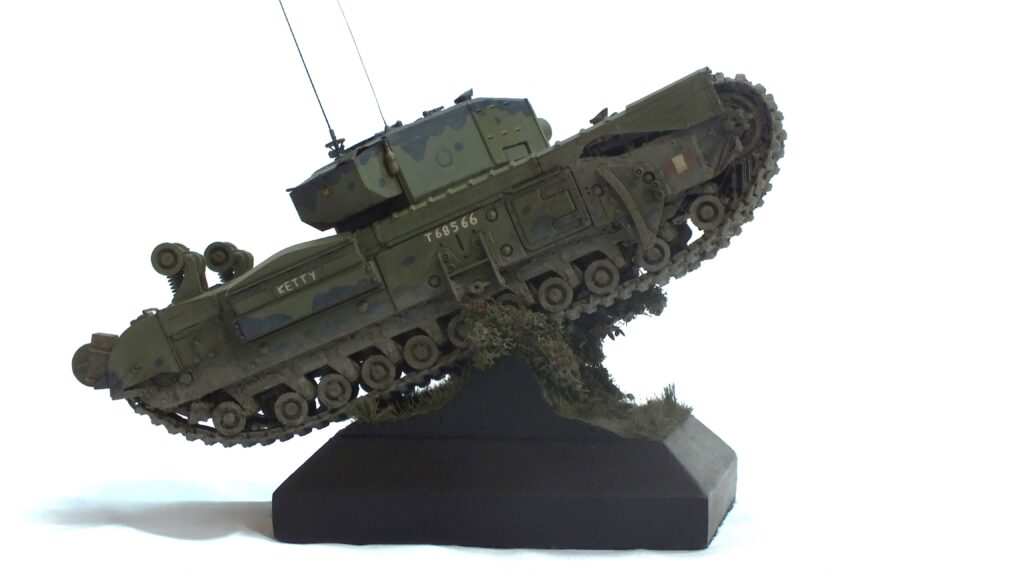
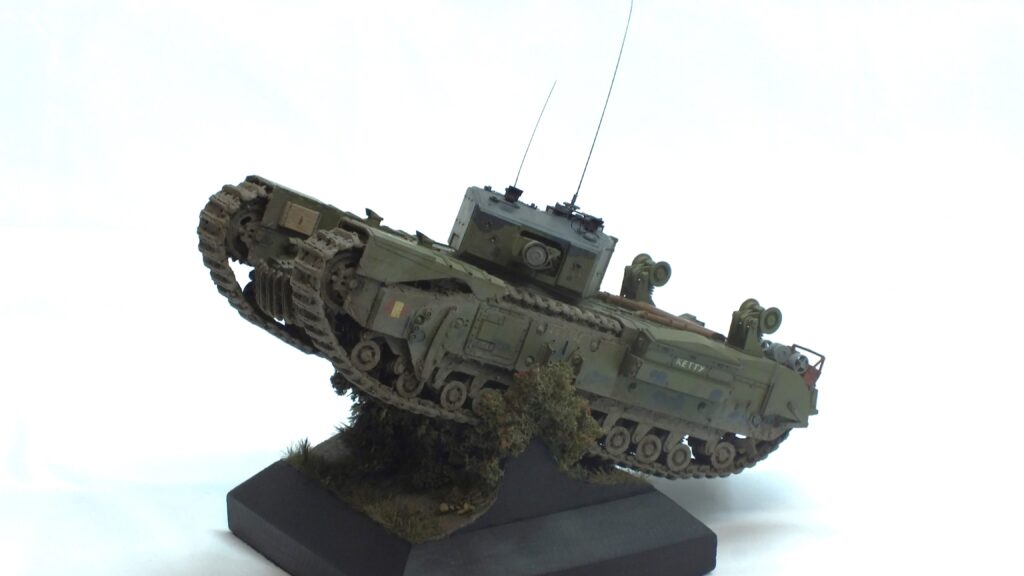
And now for the last step: I only had to paint the base and sides black and that’s it. The Churchill is done: roll – the beaty shots:
The final beaty shots

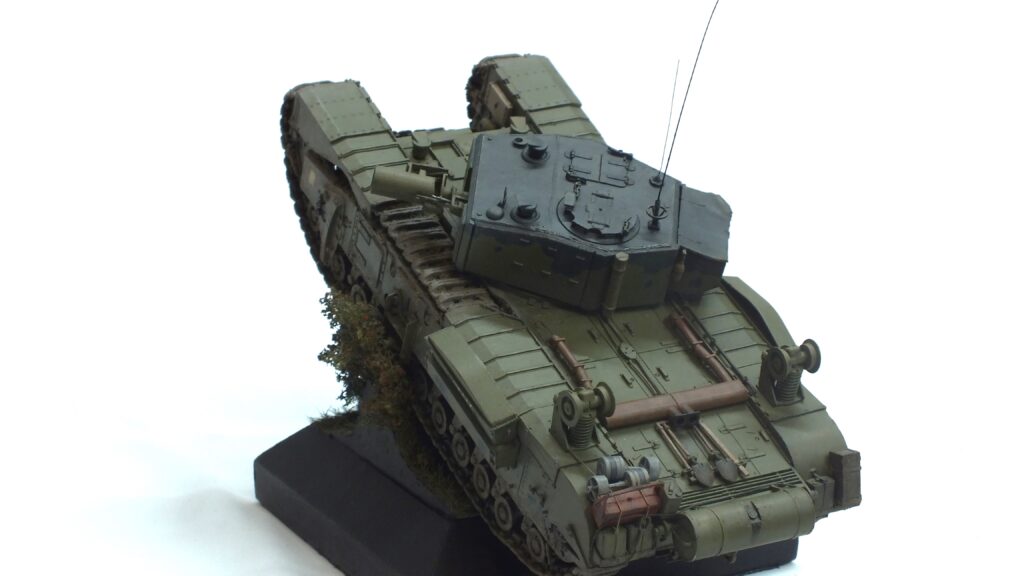
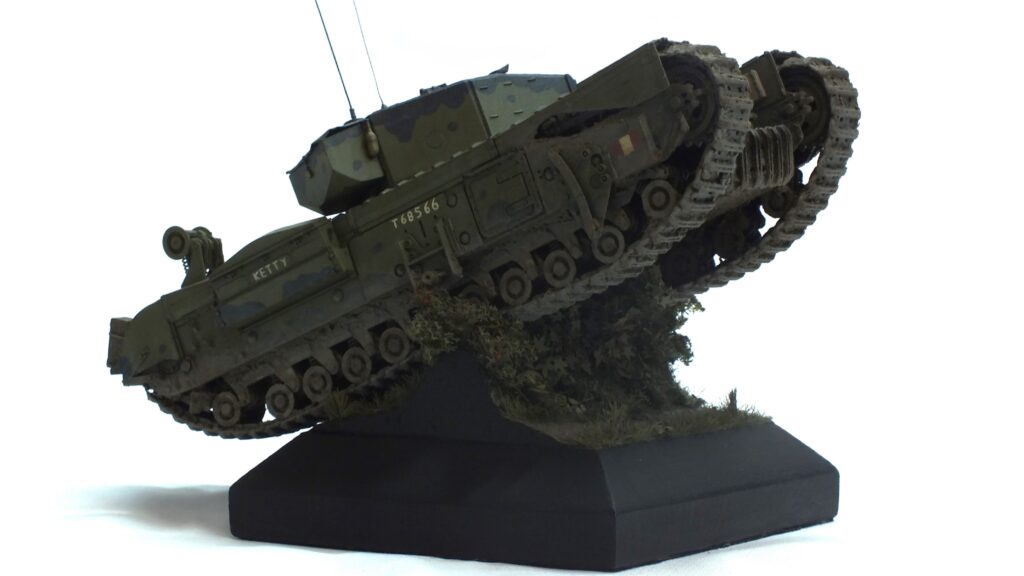

Finishing this model – still just so glad with the result
First of a little bit about the model. I am still so God damn happy with the result. One of the first models to come out just as I envisioned it. Of course, some minor flaws are there. Already mentioned these in the last article. Also, the track in the front could maybe also hang down a bit more. But that’s pretty much it. Fells so good to finally have another model finished. I now want to talk a bit outside of the model about some more general things, so for everyone not interested, now is the time to continue elsewhere.
A small perspective of what’s to come – life time and everything in between
For everyone that stayed: this model kind of perfectly displays where I am at right now. I get a lot less time for actual model making and I take just so much longer. Also, my motivation is at a real low point as of right now. I still will try my best to keep this website and the models going and as up to date as possible, it just isn’t as easy as it once was. I really hope I won’t take another 11 months to finish the next model, but as of right now I can’t say for sure.
Life isn’t always what you predict it to be or what you want it to be life just comes and goes and we have to adapt and try to overcome it. I have a lot of models in the making, but sadly none of them are really close to completion excluding maybe the M31 or the T55 in 1:48. So I will probably need a lot of time again. I just hope all of you will still be here and enjoy these little articles I am making here. I certainly do and as long as I will find at least some time to do so I will also always keep this website here up to date.
Hopefully this small vent was not too bothering, if so, please let me know and also the good old question: do you also like the model? what would you have done different? Please let me know
For now, this is it, but new articles will come, at some time…
Until we meet again
Floh out
Hi, how have you been lately?
It’s been alright, a lot to do and not a lot of time to do scale-modelling. Just hoping that gets better. Very caught up in studies as of right now sadly.
Looks like a great finishing touch with the base – I was curious about AVREs after seeing some similar vehicle info. Looking forward to seeing the completed model!
Hi, hope to not disappoint you, but that is already the finished model. You can find the pictures further down in the article. But yes, I am really pleased with the base as well.