Good evening fellow people,
you know what? We will just stick with this greeting from now on. As if I would come up with anything better than this anyways. And by now I kinda got used to it. But enough talking, how about we get onto the model of today: The Churchill Mk.3 AVRE. My personal favourite of the Churchill-family along with the Gun-carrier, which I already completed many years ago. Thus, I already knew the kit and was able to experiment a bit. And experiment I did. But first a short word about what you need to replicate this:
Materials
Churchill Mk.III AVRE – AFV Club 35167 scalemates
Churchill Heavy Plate Track – Accurate Armour T50 scalemates
Bits and Pieces box: stowage, Brass-sheet, leftover PE, etc…
Pre-build – prepration for experiments
Since I already knew the kit, I felt confident and prepared to take on some new techniques I wanted to try out. The first was a very obvious one: The tracks. I am personally not a fun of rubber-band style tracks. Especially since these lost all of their paint after a few years. I am not sure whether this would change with primer, but to replace them was no choice but a must have for me personally. Thus, the search began: Metal tracks would be the best, but they were either no longer available or sky-rocketed in price. Thus, I choose resin tracks by accurate armour. A first for me, but that is exactly why I bought this kit. To experiment. Additionally I wanted to make the lid of the rear stowage box bend. The problem – I was not able to get any PE-aftermarket. This meant I had to make my own.
Build – aka pain
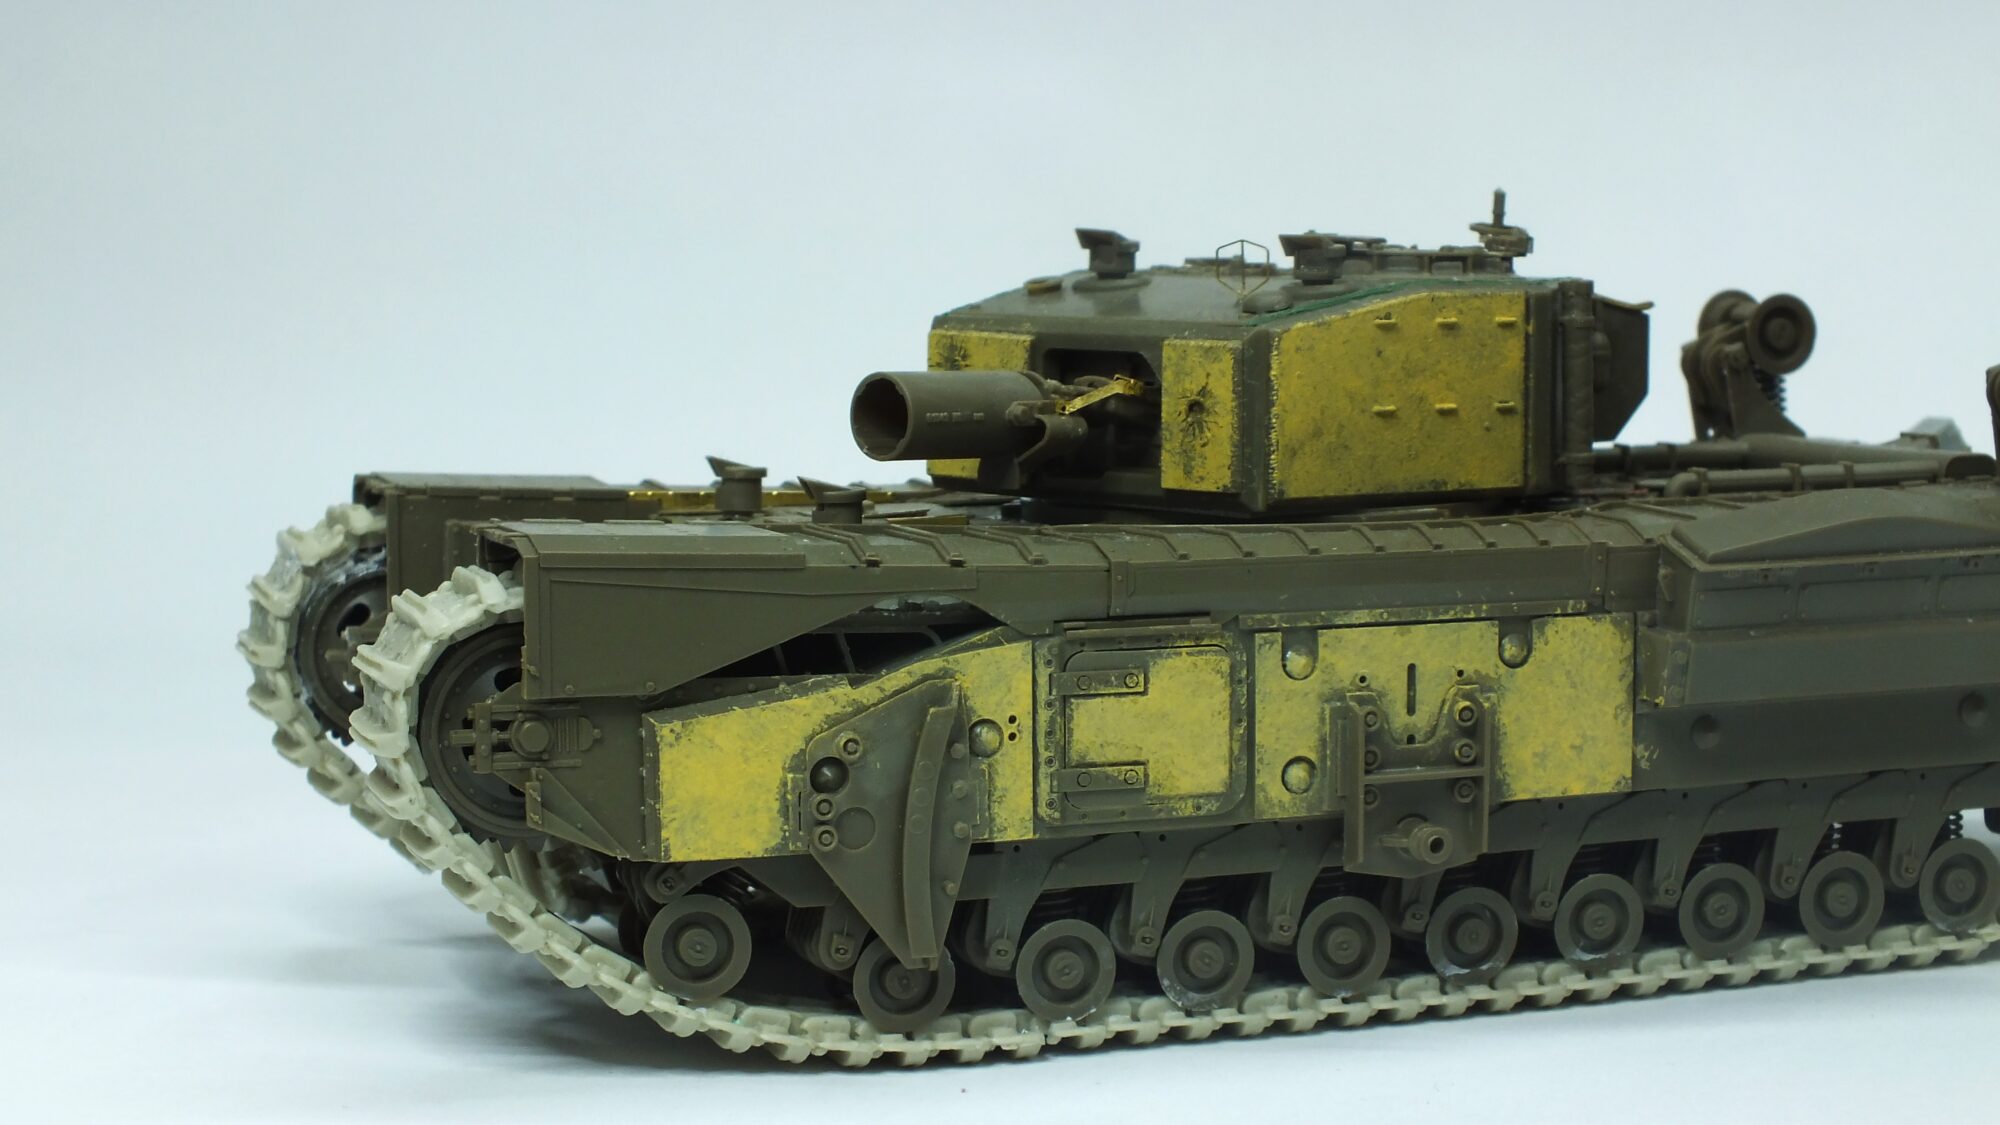
Even when feeling confident and being familiar with the kit I still dislike the suspension. I did not like to build it the first time and even less the second time. Now consider doing that twice for two sides. The even greater problem however occurred once I began to fit the tracks onto the model. Since at the time of construction winter already showed its cold side it was at least unpleasant to deal with hot water and bending resin-tracks. Made even worse when doing this on a working and instable suspension. Certainly not recommended. The next time I would either glue the suspension or get a set of simple metal or plastic working tracks. But, importantly, the tracks are now on the model and do look at least decent. The rest of the build was fairly unspectacular. Mainly adding some minor stowage, weld-seems and armour textures. The weld seems were made using green-stuff putty. The armour textures using acetone, paint and a stiff brush. In Terms of stowage I used the spare fuel-tank from the Valentine by bronco, some boxes from Italeri and additional PE-Straps from a Miniart kit I build a while ago. At this point I believed the model was finished, but something was still bothering me, something I couldn’t quite put my finger on. Something just looked … off. But what exactly? After looking at some pictures I realised the perfect condition of the stowage box. However on most Churchills the lid was often mangled. So, how to recreate this? Using the plastic piece? This did not really feel right. Using PE. I would have loved to do so, but without a PE set that turned out to be, well, complicated. So, what was a possible solution? Just make my own PE. Using a leftover piece of Brass (I had no copper available) I bend a simple sheet with a lid and added the missing clasps. This luckily returned a satisfying result I am very happy with. Certainly, something to do again next time. But now first of all the pictures for this model:

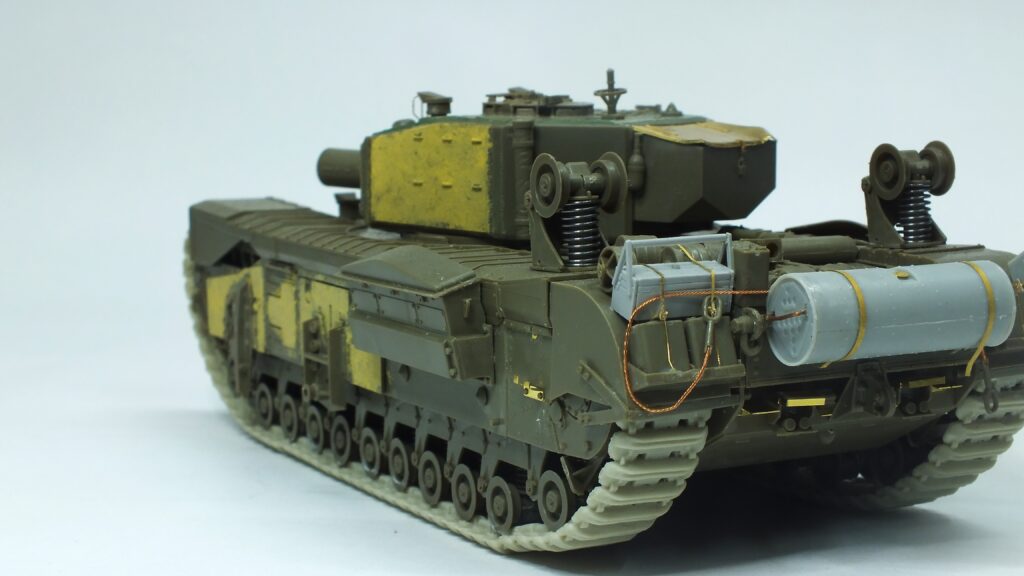

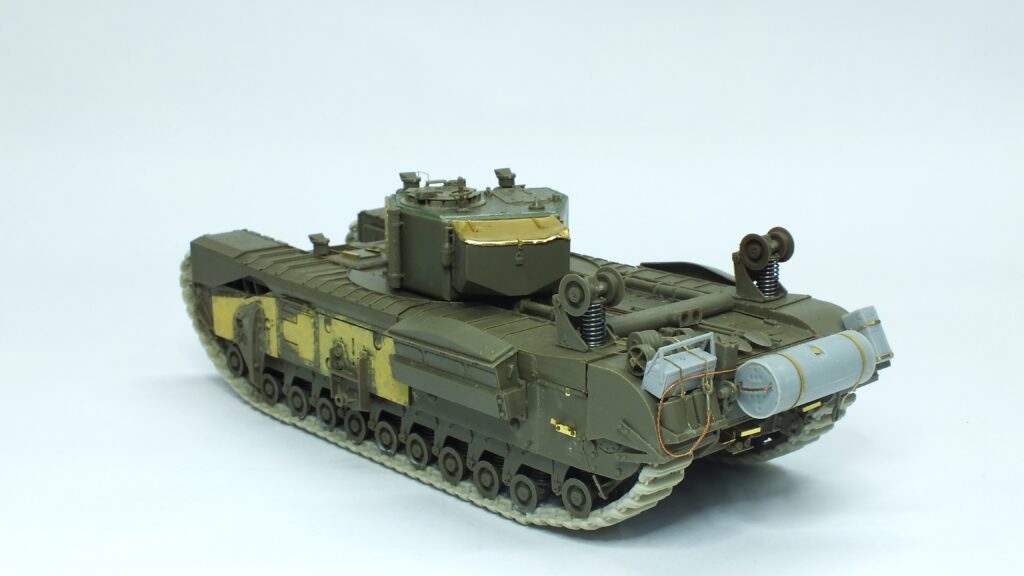
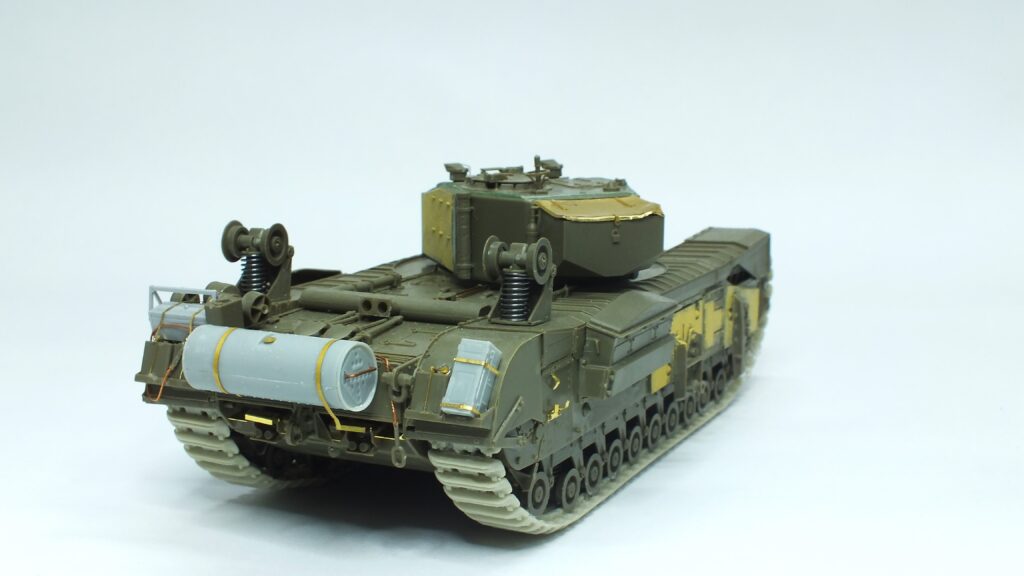
Post build – BAP!
Bap – literally the first thing I thought of when I saw this tank. It really reminds me of a 90s comic book tank with the comically large calibre gun (290mm petard mortar technically) But, now back to the model itself. Now, after that small change, I am very satisfied with the result. In my opinion nothing mind blowing but just a simple decent model and a great base for painting. About painting. After the Valentine I was kinda sad that the mickeymouse camouflage was almost completely gone after weathering. Thus I want to try it again here, this time simply with more contrasting colours. We will see how that goes.
One last addition about the title: I am still not sure whether or not I want to turn this into a diorama idea. The setting will for sure be after the Normandy landing in western-Europe, but anything beyond that I don’t know. We will have to wait and see how that turns out.
Until we meet again.
Amazing blog! Do you have any recommendations for aspiring writers? I’m planning to start my own blog soon but I’m a little lost on everything. Would you suggest starting with a free platform like WordPress or go for a paid option? There are so many choices out there that I’m completely confused .. Any suggestions? Appreciate it!
Hi,
WordPress is not free, atleast no decent options. Start with a webhosting service, like hosting and let wordpress run via that. Then just experiment. You only have to keep the legal guidelines in mind. These are different from country to country.
Hope I could help, have a great day
You made some nice points there. I looked on the internet for the topic and found most persons will agree with your website.