
Good evening and welcome to a short relaxing build for the turret of the Pzkpfw. IV ausf J by RFM, or so it might seem, a fairly calm end result with a rollercoaster ride of a story.
Materials
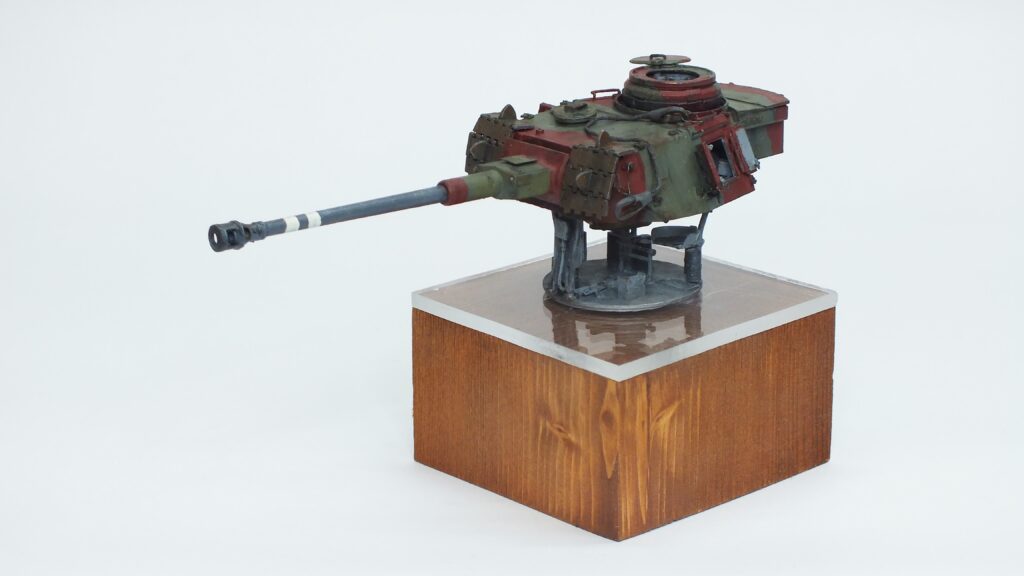
Sdkfz. 161/2 Panzerkampfwagen IV Ausf. J – Rye Field Model RM-5043 scalemates
bist-and-pieces box
Pre-build – a long time ago
Once upon a time (approximatly 2 years ago) I build what felt like all of the Pzkpfw. IV variants that were not a normal tank (Jagdpanzer IV; Stug IV; Munitionsträger) so I felt the need to give credit to the “real” Pzkpfw. IV since i was at that time very satisfied with the end result. Thus I made the decision to go all out with the build and get one of the most detailed kits on the market. That is how i got the kit which now is here 1,5 years after that. How did we get here? – I don’t really know myself, but I will try my best to explain.
Build – the rollercoaster begins
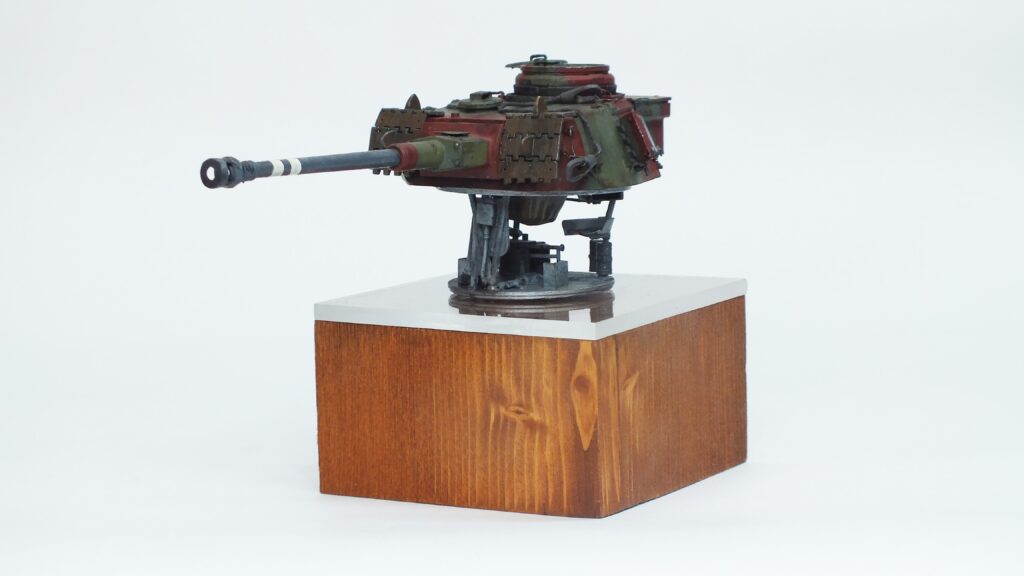
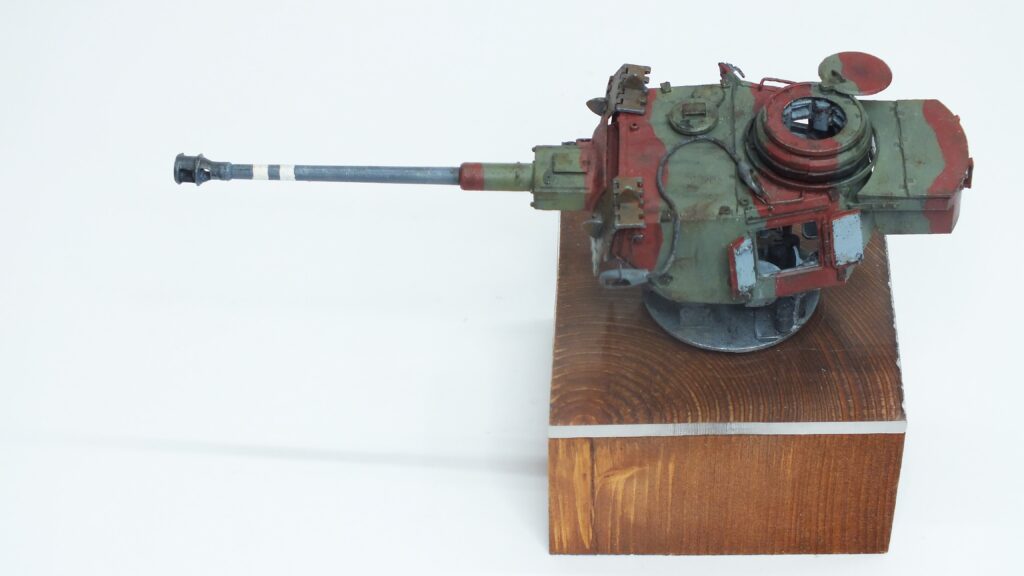
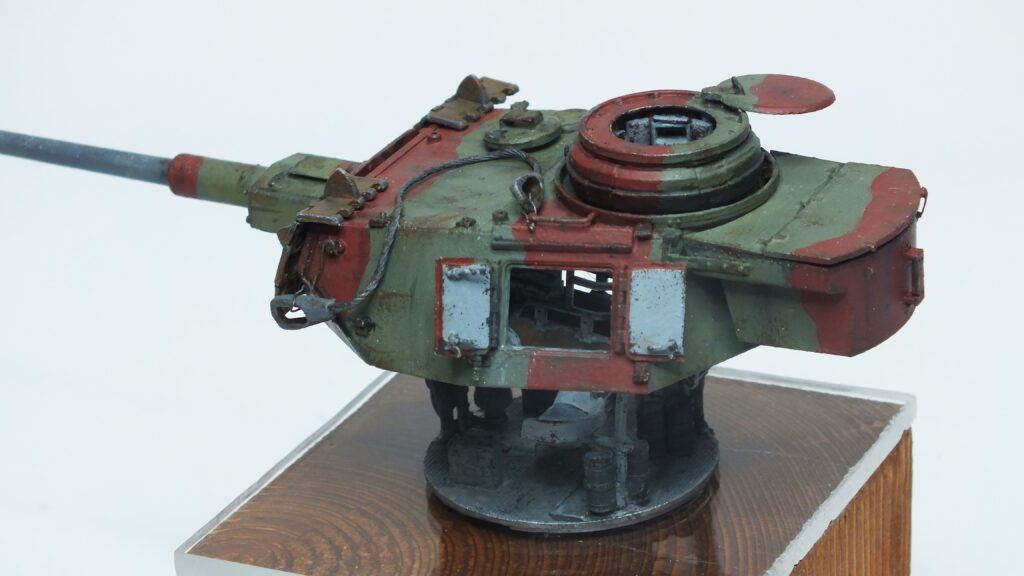
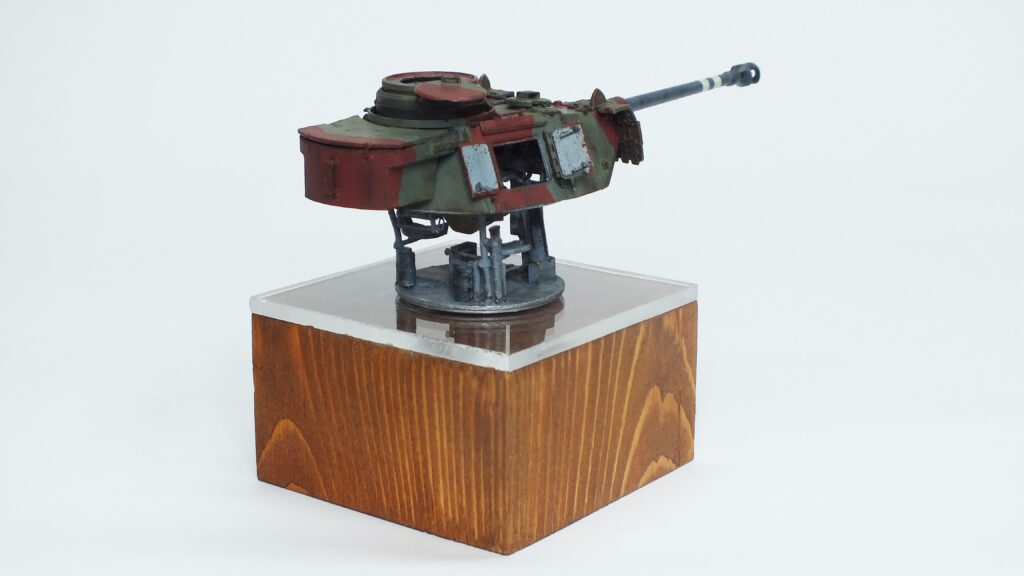
The build originally started directly after the arrival of the kit and according to the normal procedur. The full interior was completed and build within a few weeks and the outside would follow soon after. Or so I thought after something, I absolutly forgot what happend during that mystical time progress stopped immidiently (most likely I just bored after working for too long on the interior, but we don’t talk about that here) It became a shelfqueen. For more than a year. Until about half a year ago I decided to pick it up again in the effort to clean my shelf of shame, especially since this is now displayed on the planned projects page. So the same that happened to the other Pzkpfw. 4. Those who were up to date might have seen that this tank originally was supposed to be a dug in tank in the berlin defence. This plan was also going great with slow but constant progress but in the end it just didn’t look right. Thus came another, the third, change of plan to bring the interior more to life resulted in this: a simple display of the turret and it’s interior. A complete repaint, some added details and a nice base the led to this cute little model.
Post-build
In the end I am surprisingly satisfied with the result. especially considering the truly awful state of a shelfqueen it started as. I would not recommend something like this in any other case because of the simple reason on how expensive the kit is. If I would start from the beginning I would much rather show the complete interior. Still I like this model and also the weathering. It makes it a little eye-catcher, which is alway very much appreciated.
We will see each other hopefully again either in the comments, a personal contact or simply the next article.
Untile we meet again.
Hi there, You have done an incredible job. I will definitely digg it and personally recommend to my friends. I am confident they will be benefited from this website.
Hey people!!!!!
Good mood and good luck to everyone!!!!!
Hey people!!!!!
Good mood and good luck to everyone!!!!!
Thanks so much for giving everyone such a superb opportunity to check tips from this web site. It’s usually very pleasing plus packed with fun for me and my office fellow workers to visit the blog particularly thrice in a week to study the fresh things you have. And indeed, I am usually impressed with the effective methods served by you. Some 2 areas in this article are unequivocally the most suitable we have ever had.
An incredibly well-written article.
Thank you very much, very glad to hear people enjoying it.