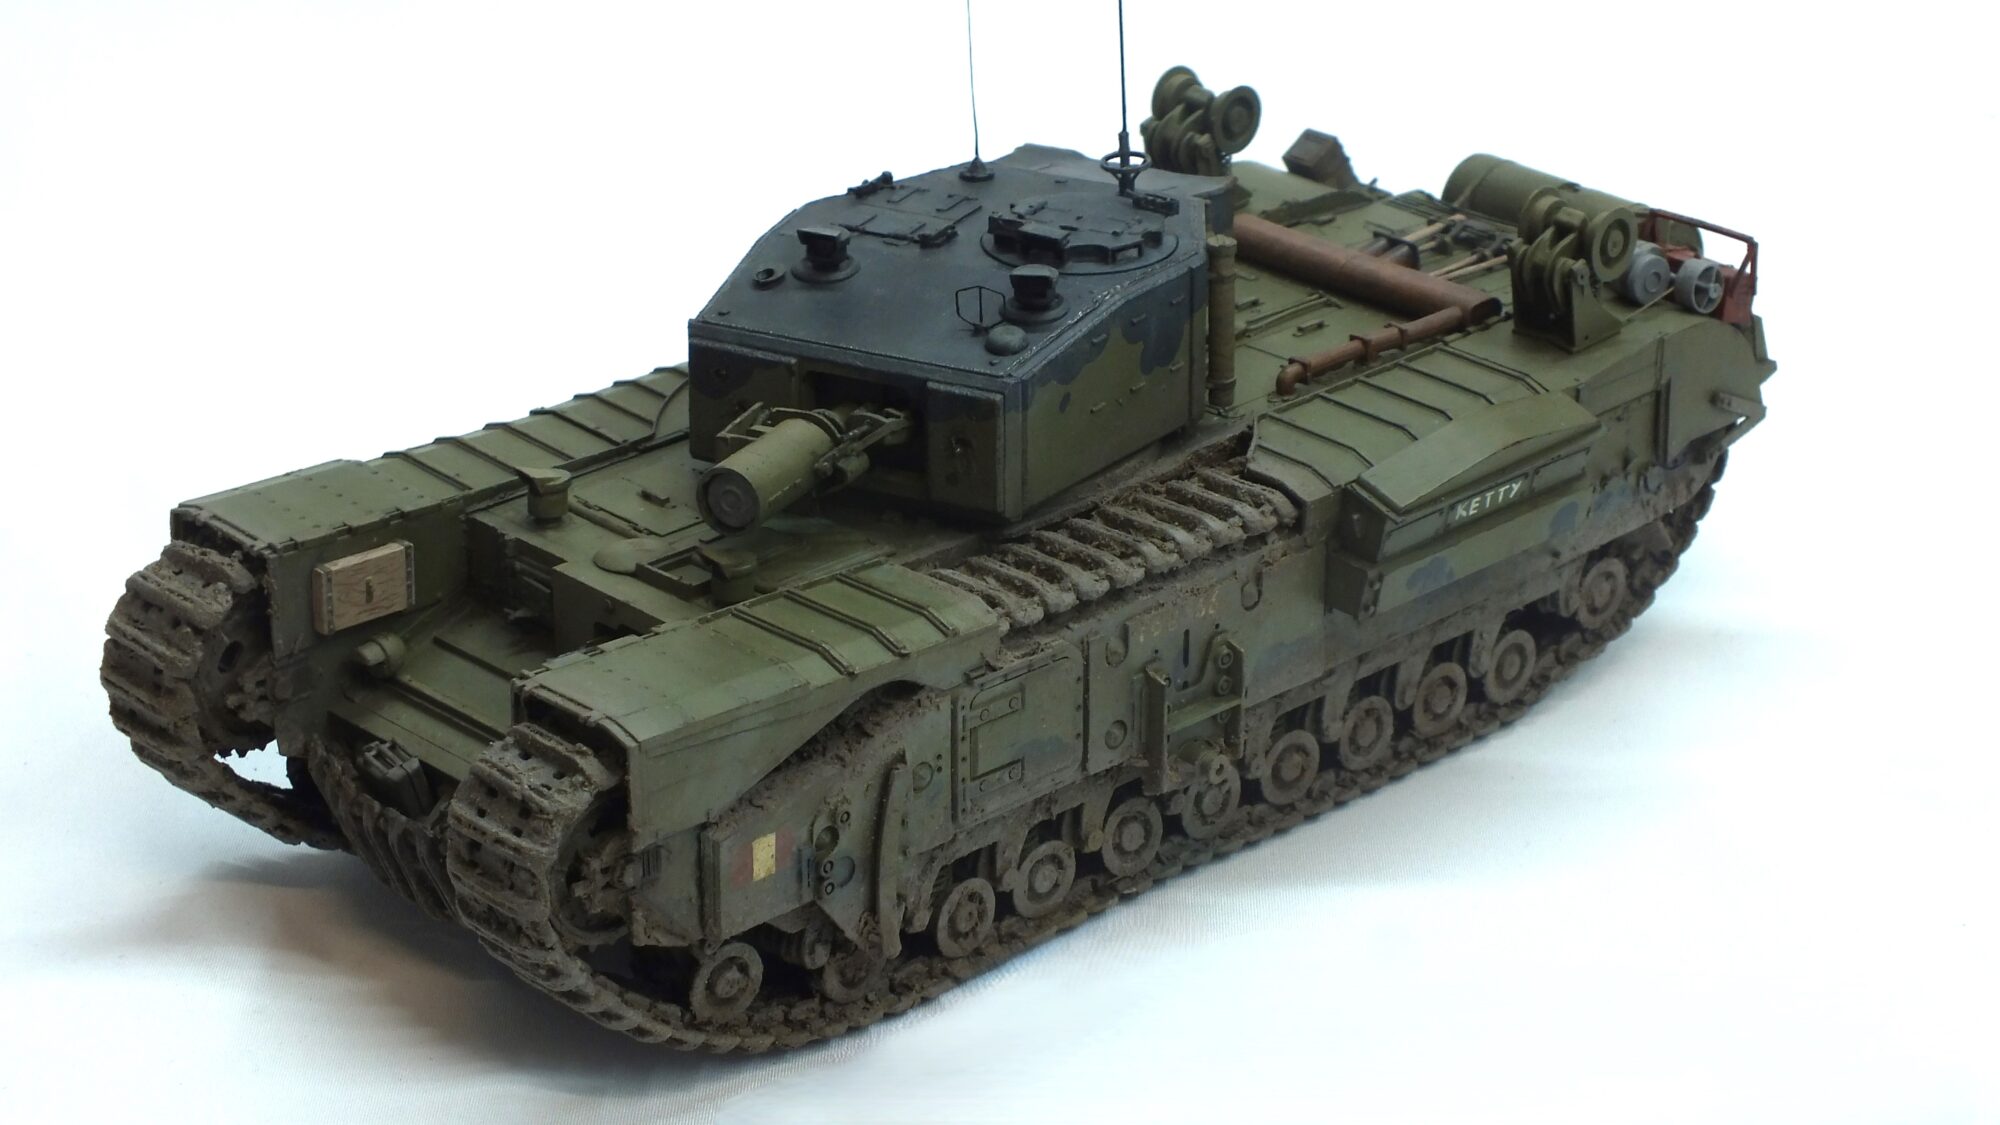
Now we finally come back together to look at a finished model, well, just the painting, but as of writing this article I am completely done with the Churchill. However, the Diorama will be given its own article.
But now onto the Churchill itself. Here we have it now finally fully painted. I already wanted to have it this way about a year earlier, but eh, whatever.
Materials:
We already used this in the last article:
Churchill Mk.III AVRE – AFV Club 35167 scalemates
Churchill Heavy Plate Track – Accurate Armour T50 scalemates
As well as some bits and pieces for stowage.
And now all that was added were colours as well as some effects-paints, here is a list of the most important paints:
Mr.surfacer – primer grey
Vallejo – model color
Revell – Aquacolor
Vallejo – earthtexture
and some more washes and other products…
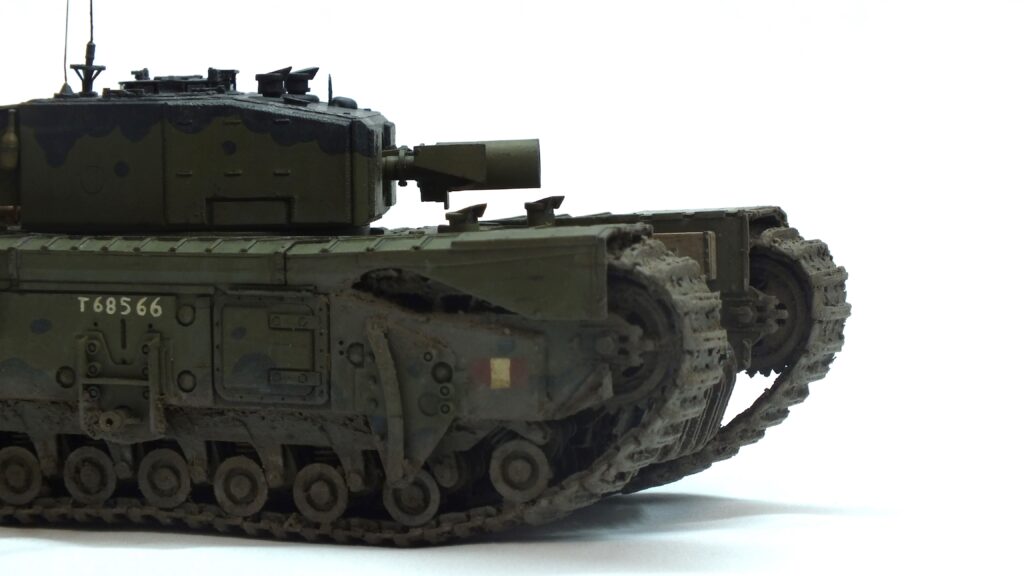
Small side note, I removed one of the fenders, nothinbg major, but it just looks a lot nicer like that, so that’s that.

Priming and Base-painting – learning from past mistakes
As with the construction finished, we can now move onto the basic priming and painting. As always, I used my favourite primer for armoured models in general: Mr.surfacer light grey. Sprayed right out of the rattle can onto the model. However, I did take a little risk: I did not spray all areas, but only the ones that needed it, like stowage, photoetch parts or the resin-tracks. Other areas just received a light pass. It worked out perfectly actually, no colour-mismatch or similar, so success, yippie. Small side note: All PE parts received a generous coat of metal-primer beforehand. I use the Tamiya one, however I believe any is fine.
Now for basic colours: I was pretty sad by the result of the mickey-mouse-camouflage on the Valentine I built two years ago. (so long ago already, damn, time passes quickly). Here I now wanted to learn from past mistakes and rectify my mistakes and I believe it worked out pretty neat. Now I achieved a fitting contrast. A contrast needed here.
Here I use exclusively Vallejo – model color. I brush paint this diluted with water directly onto the model. I prefer to not mix the colors, I drop them onto the palette and wet the brush. Then only stroke of the excess water and use the rest in the brush to dilute the paint itself. Then apply onto the model in multiple light coats.
First stages of weathering: discoloration – thinking ahead
This turned out far more difficult here than on any other model built so far. Why you might be asking yourself:
The answer is in the layout of the Diorama: The tank will not sit level or almost level terrain but angled to a pretty drastic degree. So, I had to keep this in mind when creating the discoloration effect. Here a very imbalanced effect from front to the rear with almost exaggerated highlights on the front and very subtle on the rear. Also, the different roofs of the hull and turret proofed to be challenging to match properly. Here a lot of trial and error as well as partial re-painting was needed. I probably spent the longest here out of all steps.
Here I simply used lightened versions of the base colour as well as some more aggressive lighter colours. These were then applied either by dry-brushing or placing dots and washing them with a wet brush.
After that I applied a pin wash. Here however I was able to feast on my work from the discoloration and applied the pin-wash regularly. I decided against an irregular application in order to not have a varying degree of detail throughout the model. Luckily the right call here. However, we will revisit this topic later again.
Distressing was a technique I purposely did not use here, since I did not want for it take away from the discoloration with which I was and still am extremely happy.
Chipping – The lost child
Chipping also was a challenge itself. I wanted to show the tank will passing through one of the famous hedge-rows seen typically in Normandy, these caused very distinct long scratches on the front of the hull. I sadly didn’t emphasize these enough, so they kind of got lost in the following steps, certainly something to learn for the future models. (Note to self)
Chipping itself was executed in typical fashion:
1st.: Worn of paint with lightened basecoat
2nd.: Deep metal scratches using a dark-rust-blackish colour (Vallejo dark rust is my go-to option, however I also have seen dark brown as an option)
3rd.: light rust wash in several different hues and intensities
Second stage of basic painting: Details and Stowage
Now it was time for one of my favourite stages in making any model: Painting and weathering the stowage. I technically already did this in the first chapter and in the same way. So diluted Vallejo model-color it is once again. But here also some Revell aqua-color came into play.
After that I added discoloration, a pin-wash as well as chipping just like with the rest of the model. Here I always like to use different intensities to show age as well as different wear on the components. New Ammunition was kept almost clean whilst an old civilian toolbox was beaten up and worn put. (could have even done some more there)
Spare tracks (as well as the normal tracks) were treated as always. So up to this stage we have: basic dark-rust coat. light chipping in greyish colours finished with a glaze of rust-wash.
Last but not least we have the wooden components: These also received the tried and tested procedure. This means a light-brown base coat. Woodgrain with a darker brown tone and then a highly diluted glaze withe the original colour. And done. That is in my experience perfectly fine for simple parts like we have here.
I could now make a bad exhausting joke, but the exhaust was one of the most chill parts to paint: Just the usual process – dark-grey base coat, multipole light grey to almost white discoloration. Some rusty chips. And all of that followed with a thick and heavy rust wash.
Dust and dirt – let’s get some character in
The part that always give character to the model, at least for me. This part was especially easy with this model, since I was able to almost copy exactly what I did for the Valentine a while back. Just increase the volume and intensity. I always like to add the texture just here after all other painting steps. This is for one very nerve-wrecking but also gives me the clearest sight of where I want to go with the model.
On the model I only used Vallejo-earth-texture. Still to this day my favourite product. I like to dilute it heavily with water however and applied it in various viscosities in order to create a convincing end result. Here I also added some real dirt from my garden, which was previously ground and sifted as well as some grass-fibres from Noch.
Dust and dirt painting – how to make dirt dirty?
With a convincing base-texture we can proceed to the painting here. First off: a base coat using the Revell aqua-color – why? Just because I have a very reliable colour there – “Erdfarbe” which quite literally translates to “earth-colour” so, first a base coat, using diluted paint over the textured areas and close by as well as some dry-brushing. After that I used some lighter enamel-washes to give it some texture. I also applied these in a cloudy patter as dust by gently pressing the brush on the model and turning it slightly. Also, some darker colours were used as a wash to take out the lower areas of the textures.
Last but not least the final detail for dust and dirt: I used a fine brush as well as a collection of colours to pick out single highlights as well some of the stones or fibres in the texture. This is great to break the monotone feeling and to give some more details. A technique widely already used for dioramas, which I see however somewhat scarcely for models, thus I wanted to give it some attention here.
Final details – always such a pleasure
There isn’t that much special to tell here, but it is just all those nice little finishing touches to complete the model.
One of the most noticeable techniques I used were grime stains. I added theses using a black and very dark brown wash. Either by using the streaking effects, or I used these for small oil-stains for example in the running gear, most notably on the Idler-wheel or the sprocket. The second Method is by creating clouds and vertical stains. I used this underneath the turret to give it some extra shadow or on the engine deck. Most noticeable are the exhausts both themself as well as the Tank in direct contact with the smoke receive a general treatment. Next time I could maybe also use some pigments here.
Now onto the last tiny things. These include antenna from stretched sprue painted black. highlighting the edges and welds with a lead-pencil, making clear parts for the periscopes and that’s basically it. We are done.
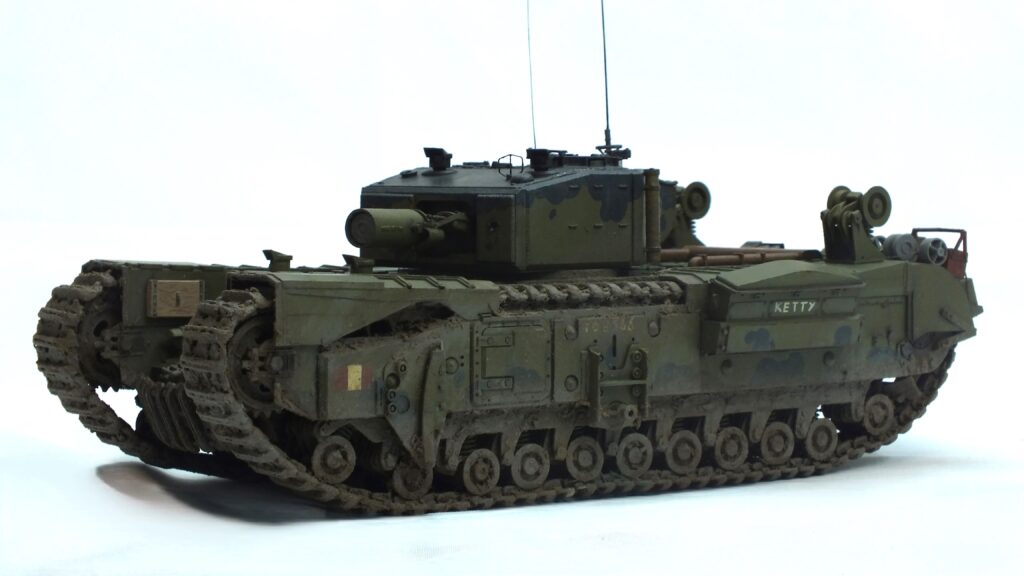
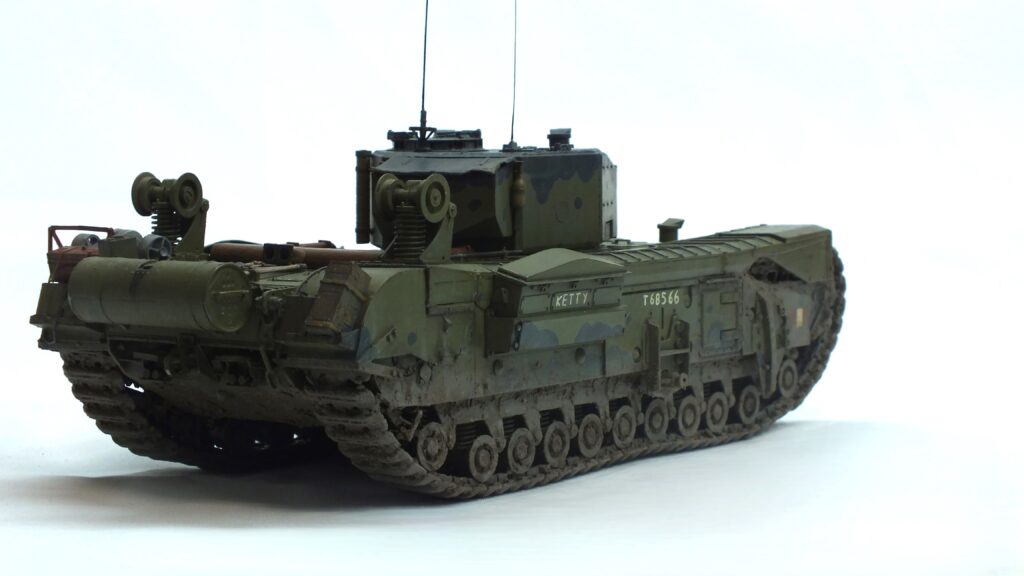
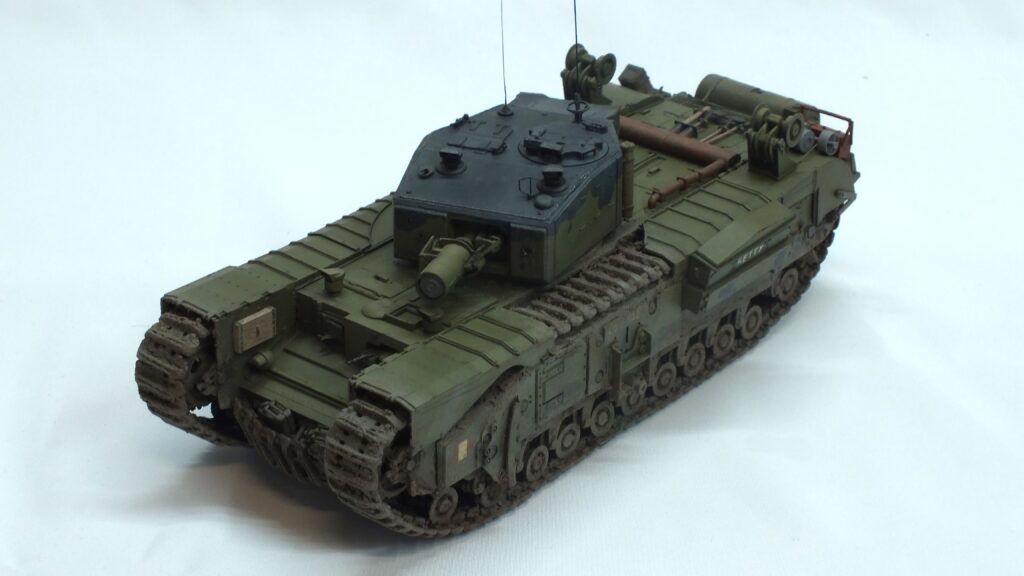
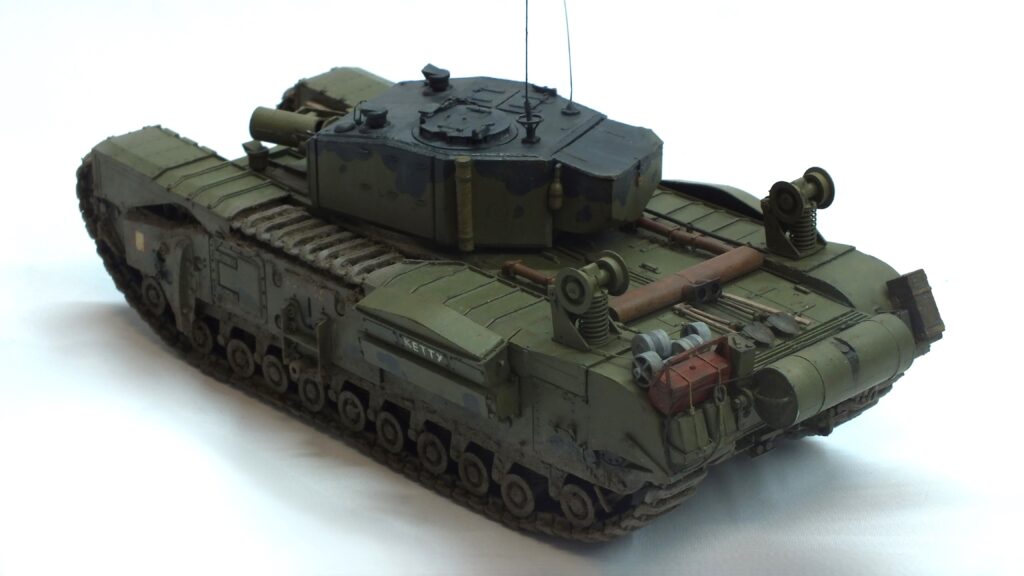
Roll: the beaty shots…
Images – Some beaty shots

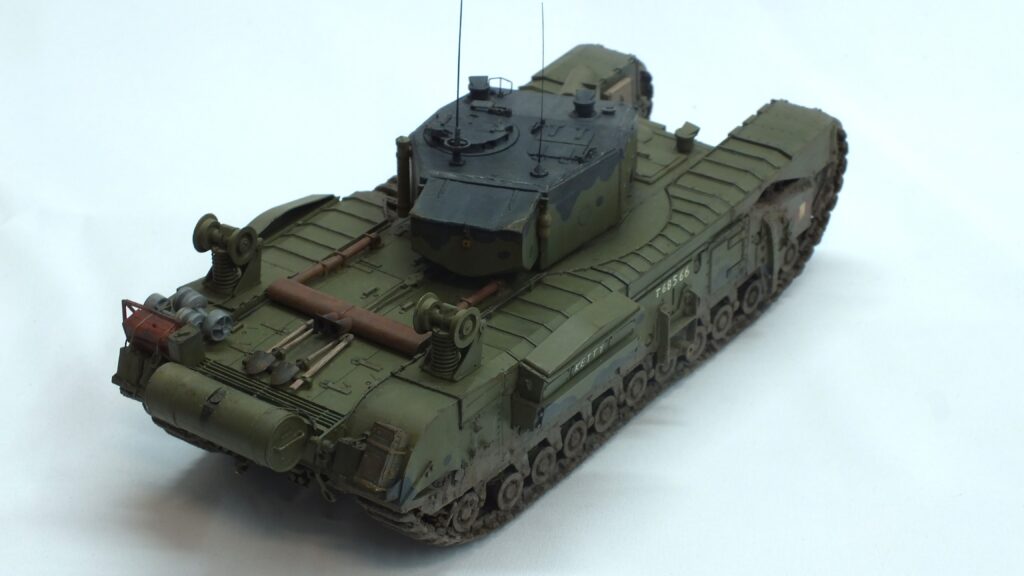
Conclusion – I am so incredibly happy with this fella
As the title already says, I am so glad, not only with the model itself but also to finally get another model done at all, it has been eternity since I last did that, I really got out of it, but I am so glad that I at least did not lose all my skill.
But about the model, there is not too much I would do different. I really like the base coat as well as the markings and discoloration. Also, the exhaust and wooden parts turned out really nice. However, there are some things I would like to do different next time. First and foremost: More and more prominent chipping. It really fades away especially in the dust and even more when I put this fella in its diorama. Also, the Tarps could receive some more love (the one on the left rear side of the turret).
But all in all, I am really happy with him and think that it’s one of my best models so far. So, success after long.
Until we meet again.
Floh out