
Some of you asked for a more detailed article on the t55, so here will be the complete story of the construction in detail:
For a basic overview as well as more pictures please check out the original article.
A first overview over the components and kits used:
Tiran 4 late version – miniart 37041 scalemates
kmt-9 mineroller – miniart 37040 scalemates
some copper wire and your typical “bits and pieces” box

Pre story
The story began with the sale of multiple used kits in close proximity to where I live. Here I was able to get multiple others, which will also be build in the near future – to be exact the Shot Kal Gimel, Churchil mk4 + Carpetlayer Type b and the kit of interest here: A Tiran 4. So what would a normal sensible person do? Probably build the kits as usual and display them. The problem with that logic is that I more often than not build the models without the usage of common sense but based on emotions as is the case here. Just a few days before I began to build it I found some very interesting pictures of a syrian tank with missing fenders, cage armour, sandbags and similar. And of course I wanted to recreate one of those. But buy a new kit? The money was too tight for something like that. Thus the choice was made to build the Tiran 4, which is conveniently based on a T-55A.
Construction
Luckily the kit in question was a Miniart kit, which means that in most cases the number of parts is unnecessarily big, but the advantage is that most of the specific parts belonging to the Tiran 4 were just left of and, since the basic hull and turret are the exact same to the T-55a kit, the only thing I had to do was to simply live those other pieces off the main body of the model. That is why no filling or sanding was necessary. The kit was also nicely detailed meaning that not many aftermarket parts were required. The usual construction progress used for every vehicle of cutting, sanding, gluing/dry-fitting was carried out for the most part with the only change of constantly looking at the reference picture the decide which parts to use. In the end I could also just have used the instructions for a t55a from scalemates, which would have eased this progress, but, oh well, you always know more after you are done.
First basic Modifications
The first real modifications made were the typical armour textures and flame cut marks. I first tried to do this with a texture paste. This sadly resulted in a by far too rough texture, which I still need to sand down. In the next projects, already including the e-60, a combination of paint and glue will be used for a more subtle texture which is more accurate to the scale. The latter were made by first cutting the edges with a scalpel and then softening them using a slight tab of glue. This method works well and will be used in the future. The last things that need to be added in terms of textures are the weld seems. These will be done using small rolled out “snakes” of green stuff. Green stuff is an epoxy putty, so almost every one of those in your preference works well. Then the textures are added using custom made tools from small pieces of metal to either create single-pass or multi-pass welds. After this was done a T 55a straight from the factory was completed.
Modifications for this specific model
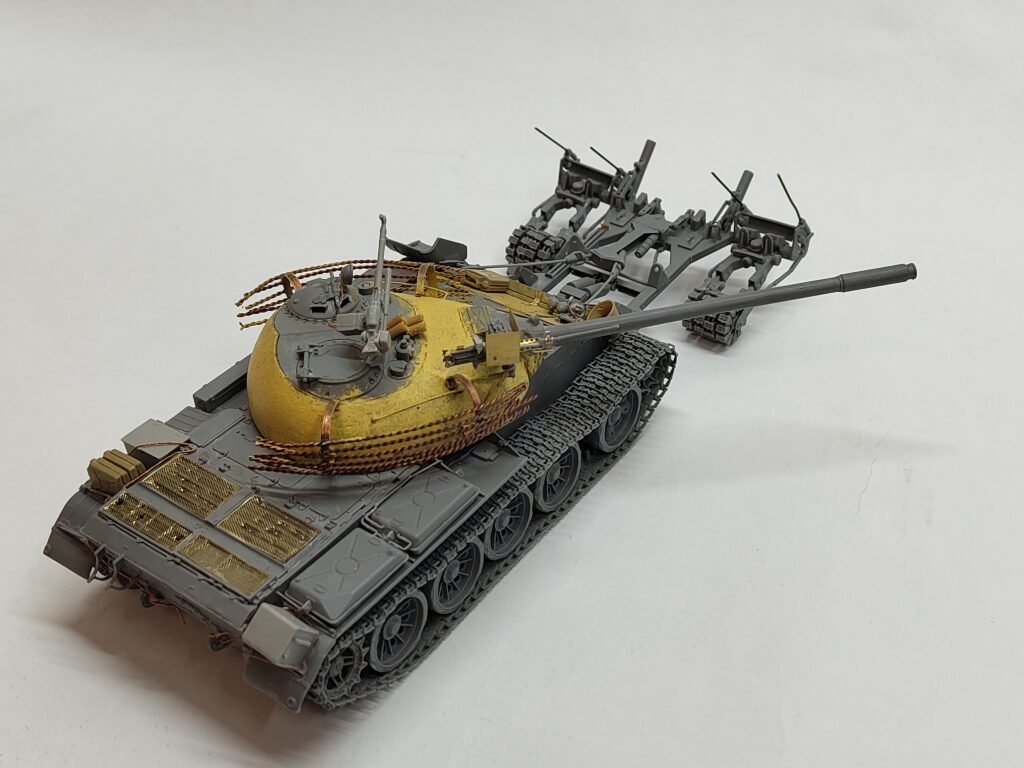
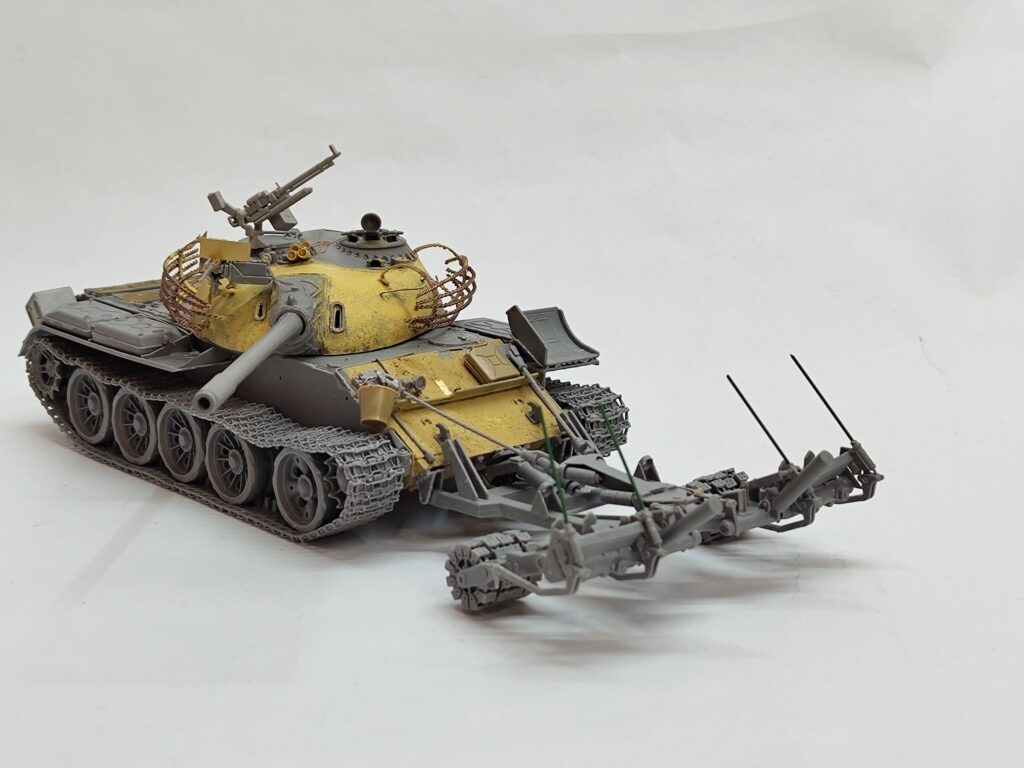
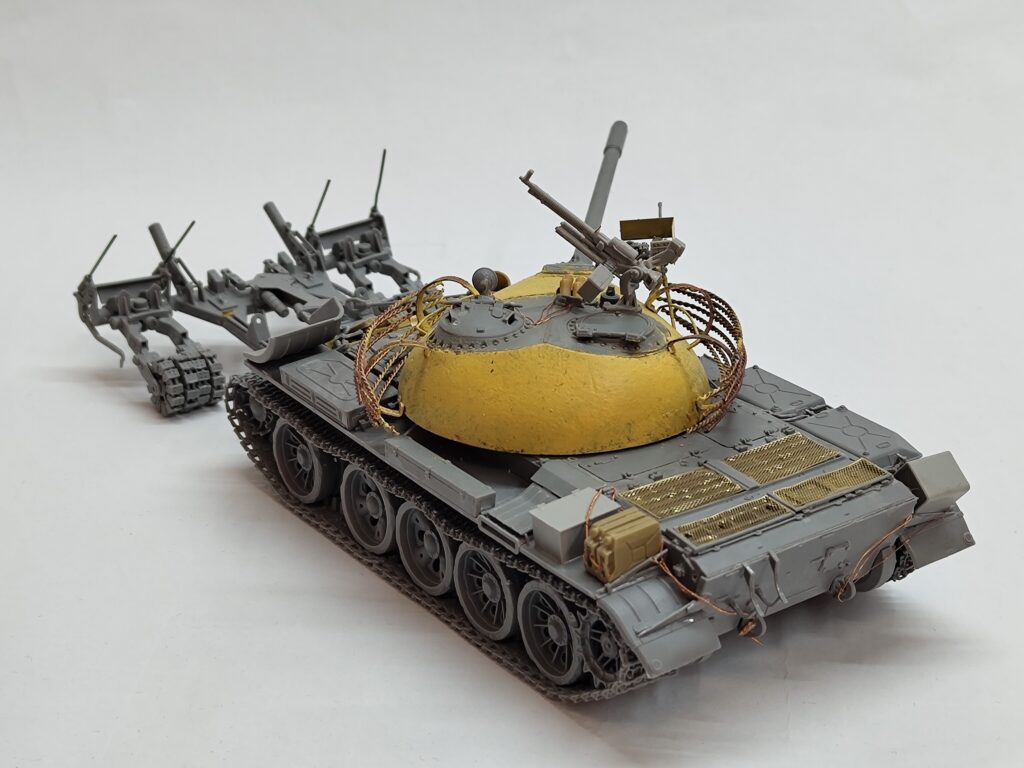
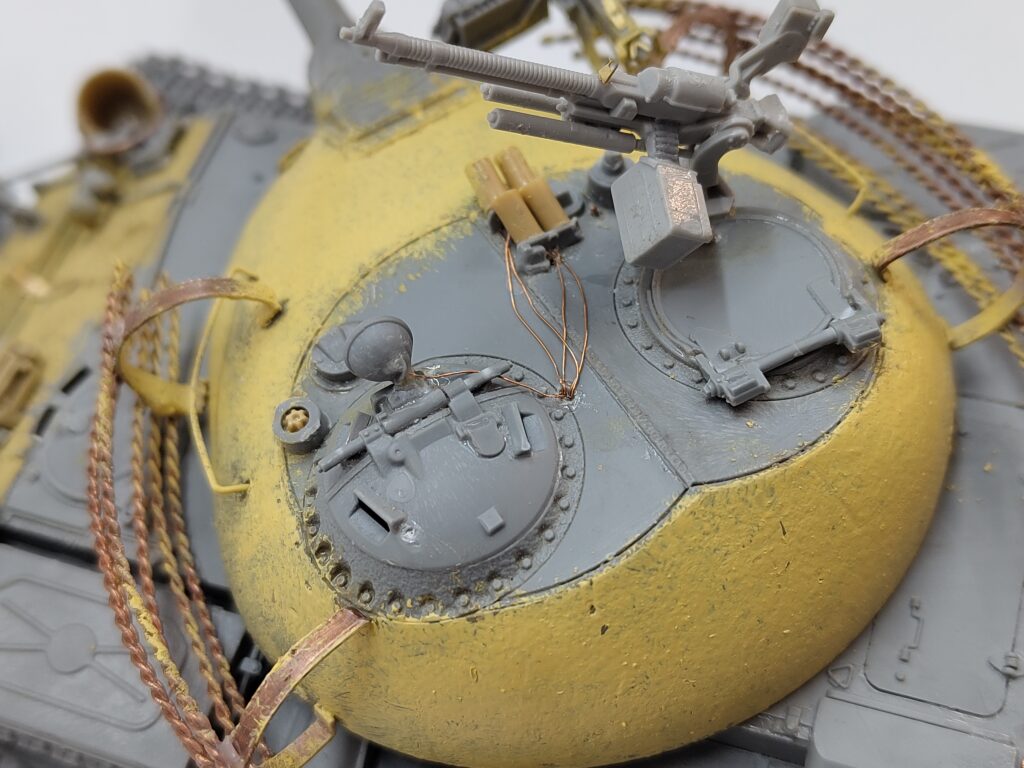
The first thing added is, in this case, also the most striking: The cage armour. Those were typically built from pieces of rebar, which gives them a very specific look. In the first step small strips were cut of a copper plate. Those were then bend into the right shape using the edge of my table end reinforced with a small metal plate. The rebars were made by winding up a strip of copper wire in an electric drill over a small stick. Those were the glued onto the model using good old super glue. Afterwards stowage was added from the bits and pieces box accumulated over the years. This was then strapped down using the same technique that is always used to attach rebar to wires with the only difference being the much smaller diameter. Hanging jerrycans were also added at the back but those will be removed later down the line, because, as pointed out by a forum-member, you would be incapable of accessing those. After this a little feature from the Tiran 4 was transferred to the model, the 50. Cal. HMG on the front of the turret was modified with other parts to seem plausible to the conflict. Last but not least a small shield to protect the gunner was added to this mg to complete this detail. The right fender was also cut off to add some battle damage. With this the modifications were completed, but I still felt as if something was missing, it now looked very similar to the Syria t55a’s that were made by other creators. So I looked into my stash and found just the right thing: A kmt-9 mine roller – not historically accurate, but close enough for me. So it was added straight from the box with only minor not noteworthy modifications done to the front. With this we are at the current point.
The next steps
First of will be the last things mentioned in the article, namely the removal of the hanging jerrycans and the sanding of the armour texture to be more historically accurate. Furthermore, I want to add some smoke barrels at the back, feature that is typically seen on those tanks. When this will be ready the usual painting process can begin. I have chosen to use a typical Syrian camouflage consisting of brown, sand-yellow and typical Russian green. After this is completed, which will take some time, the plan is to put the tank into an urban diorama. This all will be done after the e-60 is completed and its article has been completed (very early march). So the next update can be expected towards the end of March to May earliest.
I hope this gives you a bit of an insight view in my build-process. The standard techniques were left out here, since I intend to write a specific article only about each of those. So look out for that.
I am also thinking about publishing an article that displays one complete process together with pictures and long texts. Here only the things specific to this model are mentioned.
I hope you liked this rather text-based post. Maybe leave a comment with your opinion. Hope you have a good day and happy modelling.
Update:
Most of the rework in the construction phase is now completed:
certainly like your website but you have to take a look at the spelling on quite a few of your posts. Many of them are rife with spelling problems and I in finding it very troublesome to inform the reality on the other hand I will definitely come back again.
Hi Gralion torile,
thank you very much for your kind words. About the spelling: i currently have someone else proof-read everything here, these should be corrected in one or two weeks, sorry about the inconvenience.
Hope you have a great day
Hello guys! Good article floh models Armour Modelmaking floh models
floh models – Best Article!
floh models Armour Modelmaking floh models
–
Hello guys! Nice Article! Please Read!
Hi LigiaDem,
thanks a lot for recommending the article, good to hear that you liked it.
Nice Article!
Hello guys! Nice article floh models Armour Modelmaking
Hello. And Bye.
Finding the Best Tutorials and Tips
Appreciate it for all your efforts that you have put in this. very interesting information.
With your post, your readers, particularly those beginners who are trying to explore this field won’t leave your page empty-handed
Wohh precisely what I was searching for, regards for putting up.
Definitely, what a great blog and revealing posts, I definitely will bookmark your site. Best Regards!
Very nice article and straight to the point. I don’t know if this is in fact the best place to ask but do you people have any thoughts on where to hire some professional writers? Thx 🙂
hi,
no, I sadly do not have any information on this topic, since I write all my articles myself. Thank you however very much for the kind words.
Have a great day